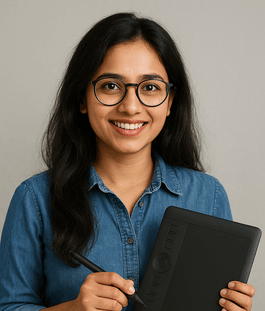
In today’s digital landscape, visuals are crucial for social media engagement. Profiles adorned with eye-catching images can greatly foster engagement, convey professionalism, and enhance brand recognition. Whether you’re a budding influencer, a small business owner, or simply someone looking to optimize their digital presence, understanding the nuances of image sizing is paramount. This guide provides you with everything you need to transform your profile pictures into stunning, circular cropped designs tailored for popular social media platforms.
Why Image Sizing Matters for Social Reach
Visual Appeal: A well-sized image stands out in a crowded feed, captivating your audience’s attention and encouraging them to engage with your content.
Professionalism: Consistent and appropriately sized images reflect professionalism, which can enhance your credibility and attract more followers or customers.
Platform Specifications: Different platforms have varying requirements for image dimensions. Uploading an incorrectly sized image can lead to cropping, blurriness, or distortion—negatively affecting user perception.
Optimizing your imagery empowers you not just to beautify your profile but to enhance your social reach, engagement, and ultimately, your brand message.
Up-to-Date Dimensions for Major Platforms
Here’s a quick reference of the ideal image dimensions for various platforms as of 2025:
1. Instagram
- Profile Picture: 320 x 320 px
- Posts:
- Square: 1080 x 1080 px
- Portrait: 1080 x 1350 px
- Landscape: 1080 x 566 px
- Stories: 1080 x 1920 px
- Reels: 1080 x 1920 px
2. Facebook
- Profile Picture: 180 x 180 px
- Cover Photo: 820 x 312 px
- Shared Image: 1200 x 630 px
- Event Cover Photo: 1920 x 1080 px
3. YouTube
- Profile Picture: 800 x 800 px
- Channel Art: 2560 x 1440 px
4. Pinterest
- Profile Picture: 165 x 165 px
- Pin Image: 1000 x 1500 px
5. LinkedIn
- Profile Picture: 400 x 400 px
- Background Photo: 1584 x 396 px
6. Twitter
- Profile Picture: 400 x 400 px
- Header Photo: 1500 x 500 px
Each platform has specific dimensions to follow for optimal display and engagement. Now, let’s dive into how to create and optimize these images through free online tools.
Step-by-Step Instructions Using Free Online Tools
Tool Recommendation: Canva
Canva is a versatile, user-friendly design tool perfect for creating visually appealing social media images, including circle-cropped profile pictures.
Step-by-Step Guide
Step 1: Sign Up or Log In
- Visit Canva.com.
- Create an account if you don’t have one or log in.
Step 2: Create a Design
- Click on the “Create a design” button.
- Select “Custom dimensions” in the dropdown menu and enter your required dimensions, commonly starting at 1080 x 1080 px for square images.
Step 3: Upload Your Image
- Click on the “Uploads” tab in the sidebar.
- Upload your desired or existing image.
Step 4: Create a Circle Crop
-
Select the Circle Shape:
- Go to “Elements” in the sidebar.
- Search for “circle” under shapes and drag it onto the canvas.
-
Adjust the Circle:
- Change the size of the circle to fit your uploaded image.
-
Position Your Image:
- Place your image behind the circle.
- Adjust the image to ensure it fits well within the circular crop.
- Create the Crop:
- Highlight both the circle shape and your image.
- Right-click and select “Mask” to achieve the circular crop.
Step 5: Download Your Image
- Click the “Download” button at the top right corner.
- Choose the preferred file type (PNG for high quality) and hit “Download.”
Additional Tools
- Pixlr: An online photo editor allowing for easy cropping and resizing.
- Fotor: Provides various templates for social media profiles and easy editing tools.
Platform-Specific Image Tips
- Best Dimensions for Reels: Stick to 1080 x 1920 px for full screen engagement.
- Story Tips: Use the full vertical dimension (1080 x 1920 px) to cover the whole screen. Incorporate engaging graphics, polls, and stickers for interaction.
- Cover Dimensions: The cover picture must be clear and relevant to your brand. Optimize it in high resolutions to prevent pixelation.
- Image Quality: Ensure your shared images maintain clarity, which often involves using high-resolution images of 1200 x 630 px.
YouTube
- Channel Art Tips: Use the recommended dimensions (2560 x 1440 px) to ensure all device views display your branding accurately.
- Profile Picture: Stick to an 800 x 800 px square that clearly represents your brand.
- Focus on Vertical Pins: Pins measuring 1000 x 1500 px perform better because of the vertical format.
- Text Overlay: Include brief, bold text summaries to make your pins engaging and sharable.
- Professionalism is Key: Your profile picture should reflect a professional demeanor while being sized at 400 x 400 px. Tailor your background photo to reflect your industry pertinently.
- Cultivate Your Brand Image: Your profile picture can be an avatar or logo but should fit snugly within a square frame.
Do’s and Don’ts of Resizing for Each Platform
Do:
- Use high-res images.
- Ensure your subject is centered in the frame.
Don’t:
- Use off-brand colors or styles.
Do:
- Regularly update your cover photo to keep content fresh.
Don’t:
- Use images with text that’s too small to read.
YouTube
Do:
- Keep a consistent theme across your channel art and profile.
Don’t:
- Upload pixelated images, which can make your channel look unprofessional.
Do:
- Use eye-catching images and bold text overlays.
Don’t:
- Ignore the importance of vertical formatting.
Do:
- Use a professional headshot.
Don’t:
- Use casual images or selfies.
Do:
- Keep your avatar simple and recognizable.
Don’t:
- Avoid cluttered images that don’t convey your brand.
Recommendations for File Type, Quality, Compression
For social media, the file types you should consider include:
- PNG: Best for images with transparency and higher quality.
- JPEG: Ideal for photographs where file size matters.
- GIF: Use for animated images, but be mindful of file size limits.
Compression Tips
- Use tools like TinyPNG or Compressor.io to compress images without losing quality.
- Aim for file sizes below 1MB for faster loading times and to comply with upload limits on most platforms.
Downloadable Checklist
To consolidate the information above and help you optimize your images effortlessly, here’s a free checklist:
Image Optimization Checklist for Social Media
- [ ] Choose the right platform dimensions.
- [ ] Upload high-resolution images.
- [ ] Craft a consistent visual presence.
- [ ] Create circle crops as needed.
- [ ] Use PNG or JPEG formats.
- [ ] Compress files as necessary.
- [ ] Regularly update profile and cover images.
Download the checklist here! (Insert Link)
Conclusion
Optimizing your social media profile images is vital for making a strong first impression and enhancing your online presence. By understanding the required dimensions for each platform and utilizing free tools while following best practices, you can easily transform your profile pictures into eye-catching visuals that represent your brand effectively.
Use the tips and resources provided in this guide to stay ahead in the social media game, ensuring that your visuals capture attention and encourage engagement. With the right approach, your social media profiles can become vibrant, inviting spaces that truly reflect who you are.
Feel free to refer back to this guide anytime you need to refresh your profile visuals or are venturing into new platforms. Happy cropping!

