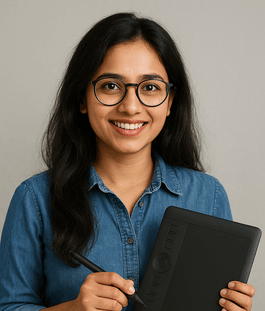
In the digital age, where social media platforms dominate the landscape of communication and branding, the visual appeal of your profile picture (DP) is more important than ever. With billions of users engaging daily, it’s essential to capture attention quickly. This guide will provide you with comprehensive insights on optimizing images for various platforms, ensuring your visuals stand out and maintain a professional appearance.
Why Image Sizing Matters for Social Reach
Image sizing is crucial for several reasons:
-
First Impressions: Your profile picture often serves as the first point of contact with potential followers, clients, or collaborators. An attractive, well-sized image helps you create a memorable first impression.
-
Platform Algorithms: Social media algorithms reward content that engages users. High-quality, appropriately sized images are more likely to be shared and liked, increasing your visibility.
-
Consistency Across Platforms: Maintaining a coherent visual identity across various platforms is essential for branding. Using optimal sizes ensures consistency and professionalism.
- User Experience: Properly sized images load faster and reduce pixelation or blurriness, enhancing the overall experience for users.
Up-to-Date Dimensions for Major Platforms
Keeping up with the specific image dimensions for each platform is essential to ensure your content looks great everywhere. Here’s a breakdown of the current dimensions for major social media platforms as of 2025:
- Profile Picture: 320 x 320 pixels (shown as 110 x 110 pixels on mobile)
- Posts (Square): 1080 x 1080 pixels
- Posts (Landscape): 1080 x 566 pixels
- Posts (Portrait): 1080 x 1350 pixels
- Instagram Stories: 1080 x 1920 pixels
- Reels: 1080 x 1920 pixels
- Profile Picture: 170 x 170 pixels (shown as 128 x 128 on smartphones)
- Cover Photo: 820 x 312 pixels
- Shared Image: 1200 x 630 pixels
YouTube
- Channel Profile Picture: 800 x 800 pixels
- Channel Art: 2560 x 1440 pixels (minimum safe area: 1546 x 423 pixels)
- Profile Picture: 165 x 165 pixels
- Pin Image: 1000 x 1500 pixels (optimal aspect ratio: 2:3)
- Profile Picture: 400 x 400 pixels
- Banner Image: 1584 x 396 pixels
- Profile Picture: 400 x 400 pixels
- Header Photo: 1500 x 500 pixels
Step-by-Step Instructions Using Free Online Tools
Creating eye-catching DPs and ensuring optimal sizing can be done efficiently using free online tools. Below are step-by-step instructions using Canva and Fotor, two excellent resources for optimizing your images.
Using Canva to Resize Images
-
Sign Up/Log In: Go to Canva and create an account or log in.
-
Create a Design:
- Click on "Create a design" at the top right.
- Choose "Custom dimensions" and enter the desired size (for example, 1080 x 1080 pixels).
- Click "Create new design."
-
Upload Your Image:
- Click on "Uploads" in the left sidebar.
- Upload your image by clicking the "Upload an image" button.
-
Resize and Adjust:
- Drag your image into the design space.
- Use the corner handles to resize while maintaining aspect ratio.
- Experiment with filters, backgrounds, and elements to enhance your design.
- Download Your Image:
- Click “Share” in the top right corner.
- Select “Download,” choose the file type (PNG for higher quality), and click “Download.”
Using Fotor for Quick Resizing
-
Visit Fotor: Go to Fotor.
-
Select Resize Function:
- Click on "Edit a Photo."
- Upload your image.
-
Resize the Image:
- Go to the "Resize" option in the left sidebar.
- Enter the specific dimensions for your desired platform.
- Click "Apply" to resize the image.
- Enhance and Save:
- Make any additional edits using Fotor’s tools (filters, brightness, etc.).
- Click on "Download" to save your final image.
Platform-Specific Image Tips
- Reels and Stories: Always use vertical images (1080 x 1920 pixels). This format maximizes screen space and engagement.
- Carousel Posts: If using a mix of images and videos, ensure all content adheres to the same dimensions for a cohesive look.
- Cover Photo: Ensure your cover photo’s essential elements are within the safe area (820 x 312). This prevents crucial details from being cropped out on certain devices.
- Shared Images: Use high-resolution images (1200 x 630) for versatility in displayed formats.
YouTube
- Channel Art: Make use of the entire 2560 x 1440 space, but focus critical details within the safe area to ensure visibility across devices.
- Thumbnails: Eye-catching thumbnails (1280 x 720 pixels) should include readable text and vivid imagery.
- Vertical Pins: Stick to the 2:3 ratio for vertical pins. This format tends to garner more engagement and clicks.
- Professionalism: Use clear, high-quality images that convey professionalism. Your profile picture should be well-lit and focused on your face.
Do’s and Don’ts of Resizing for Each Platform
Do’s
- Use High-Resolution Images: Always start with high-quality images to prevent pixelation.
- Maintain Aspect Ratio: Preserve the aspect ratio to avoid distortion when resizing.
- Test Across Devices: Check how the image appears on different devices (desktop, mobile).
- Utilize Branding Elements: Incorporate logos or brand colors consistently.
Don’ts
- Avoid Overcrowding: Don’t cram too much detail into profile pictures; simplicity often works best.
- Don’t Ignore Platform Guidelines: Each platform has unique requirements; adhere to them for optimal display.
- Avoid Unnecessary Compression: Too much compression can lead to loss of quality; strike a balance between file size and image clarity.
- Neglect Updates: Keep informed about changing dimensions and guidelines across platforms.
Recommendations for File Type, Quality, and Compression
When saving images for social media, consider the following:
-
File Types:
- Use PNG for images needing transparency and high quality.
- Use JPEG for standard images with a balance of quality and file size.
-
Quality Settings:
- Aim for 80-90% quality settings for JPEG files to optimize loading times without significant quality loss.
- Compression Tools:
- Use tools like TinyPNG or Compressor.io to reduce file size while maintaining quality.
Free Checklist for Optimizing Your DPs
- Choose your platform and its optimal image size.
- Select a high-quality image to use as your dp.
- Use a design tool to crop/rescale your image to the required dimensions.
- Enhance your image with filters or text as necessary.
- Download the image in the recommended format (PNG or JPEG).
- Test the appearance on multiple devices to ensure quality.
- Post your image and monitor engagement.
Final Thoughts
Creating eye-catching DPs for Instagram and other social media platforms doesn’t have to be a complicated process. With the right tools and an understanding of optimal image dimensions and quality, you can easily transform your profile to stand out in the crowded digital landscape. Remember to stay current with changes to platform-specific guidelines, and most importantly, keep experimenting to find what works best for your audience.
Downloadable Checklist:
For your convenience, click here to download the image optimization checklist.
By following these strategies, you can enhance your social media presence and connect more effectively with your audience, ensuring that your images always look their best. Happy creating!

